I’ve always wanted to make a cloud chamber – and there are a lot of great videos on the internet on how to construct one. But I found it was easy to build, but not so easy to get it to actually work. After many mistakes, I saw my first particle tracks!
The theory is that we fill a chamber with a supersaturated vapor. A pure (I used 99%) isopropyl alcohol is used because it evaporates so well. We saturate something absorbent (like felt) at the top of the tank. Then as it evaporates, it falls to the bottom. The bottom of the tank is a very cold metal plate (made cold by sitting on top of some dry ice). As the alcohol vapor falls and hits the clod plate, it cools. Right above the metal plate floor, there is an area where most the alcohol has not but is on the verge of condensing. This is where the magic happens. When a charged particle passes through this supersaturated vapor, it ionizes the vapor molecules with its passage, which creates the misty trails that we see. By looking at the trails, we can usually deduce what type of particle it was. There is a ton of websites on how to interpret the different types of cloud tracks.
I won’t rehash what is already out there, but instead here are some of my painful lessons learned in getting my cloud chamber to work:
- Attaching the felt to the top of the chamber
This was much harder than I thought. I learned that distilled alcohol dissolves almost all types of glue and adhesives! The best success I had was using a silicone based adhesive on the felt (one that bonds to glass), and then wait the full 24-48hrs curing period for the adhesive to set before adding any alcohol. This seems to create a strong bond. - What isopropyl alcohol to use
Most websites says use anything 91% pure or better, which is easy to find at your local Walgreens or other pharmacy. But, I think 98-99% is better. You will NOT find that at the local pharmacy, you need to go to your local hardware store and they will typically sell it in 1 gallon jugs (or Amazon).
- Not having enough alcohol, or not enough dry ice
My first try, I was stingy with the alcohol on the felt (cause it kept falling off), and I thought a few bricks of dry ice would be plenty (2 lbs worth). Also, my metal plate was NOT sitting directly on the dry ice. Nothing really happened. It wasn’t until I properly attached the felt (see #1 above) and properly soaked the felt, completely filled my dry ice cavity (10lbs worth!) and added the electric warming blanket on top did I create the conditions for this to work. (fyi I had a 10”-20” glass tank, which is fairly large; yours may be smaller) - Where the heck does one buy dry ice?!?
Well, as it turns out, your local ice cream shop has heaps of the stuff and is happy to sell it to you, usually by the pound (where I live, it was ~$4 per pound). They will likely give you some bricks in a paper bag – bring a small cooler to carry it in. And be careful, do NOT handle dry ice without heavy gloves on. - Making the chamber airtight
This is really important, but can be hard depending on how your chamber is constructed. I used Vaseline on the bottom edges, but that is a mess to clean up. Rubber strips, cloth, anything to make it as airtight as possible will help. - Painting the insides black (tank on 3 sides, and the metal plate on the bottom)
This is not necessary, but helpful. I first just wrapped my glass tank on 3 sides with black paper on the outside, but that just make a mirror-like surface on the inside when I shined my light into it. People have suggested painting the inside of the tank, and the metal plate, black. - Metal plate should rest directly on the dry ice
Size the metal plate so it sits directly on the dry ice, and as the dry ice melts, the metal plate is sized within the base so it continues to float down with the melting dry ice (so there is always contact between dry ice and surface of the metal plate). - Create a temperature gradient by adding heat to the top of the tank
I used a warming blanket set to low or medium. I’ve heard others use bags of hot water. I believe the heat just helps the alcohol to evaporate more quickly which then falls to the bottom of the tank where it hits the cold air created by the dry ice.
Use you phone camera as view finder to see more clearly
I put my phone on a tripod directly up against the surface of the glass, and when I got the reelections worked out, was able to see much more clearly the “snow” that the alcohol was creating, as well as the cloud and the tracks. The zoom function is key!
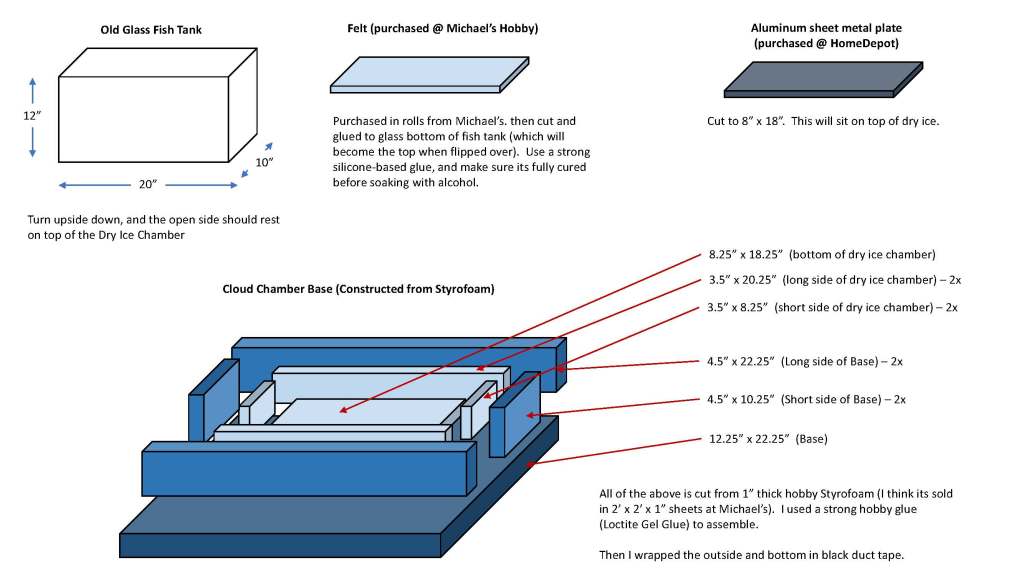
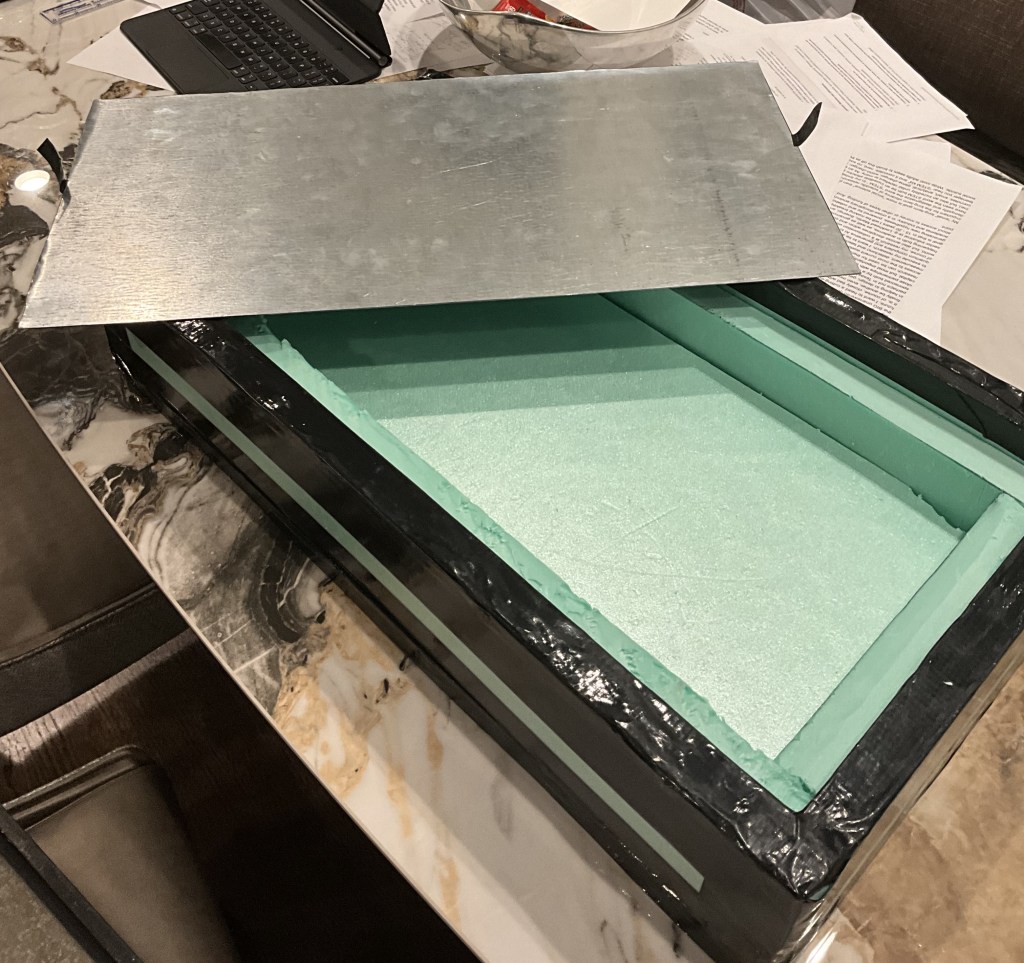
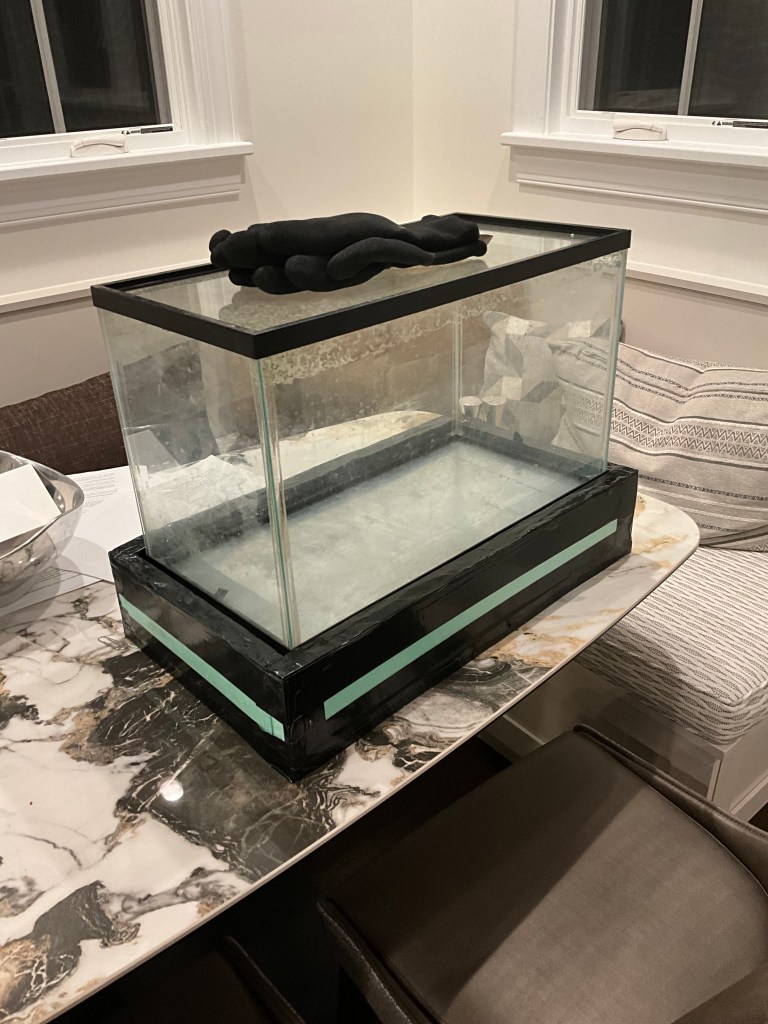
Below is my design for how I built my cloud chamber if this is helpful. You will need to scale this to your enclosure size: